

Monster High 3d Nail Design Kit
How to create a 3D monster in just 9 steps
Willem-Paul van Overbruggen has worked in the CG industry for over 15 years, nearly eight of which he has spent as a character artist at Vanguard Entertainment Group in the Netherlands. Recently he has returned to freelance work, and this recent project enabled him to work with his friends on the Rhinosaur.
"Upon hearing two of my friends were trying to create a prototype for their own game named Canto - a multiplayer co-op action game where you fight giant monsters - I instantly offered my help to create a wider set of creatures to battle," says Overbruggen enthusiastically. "I also brought my good friend Mark Facey onboard to help with the concept art and texturing."
The result is this colourful creature, full of character and alien charm. Here Overbruggen shares his workflow so that you may create a cool character of your very own.
01. Start with concept art
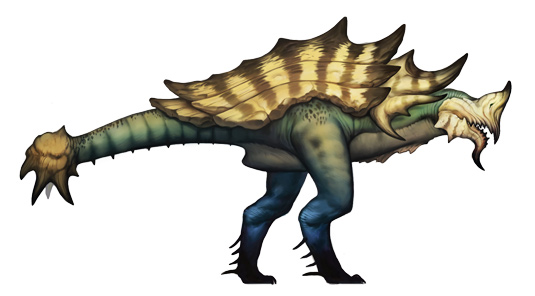
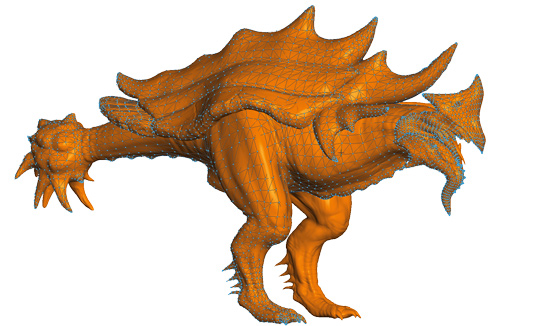
For Canto we required a large bipedal creature that was fast, big and could pose a real threat to four players at once with a variety of attacking moves. Mark Facey came up with an amazing design that he dubbed the Rhinosaur.
02. Create the mock-up
The first thing I do is to take the concept art and block out a very
rough version, followed by a simple planar projection of the concept art back onto the model. This way we can easily review it in-game to make sure it is the correct size and actually fits inside the world.
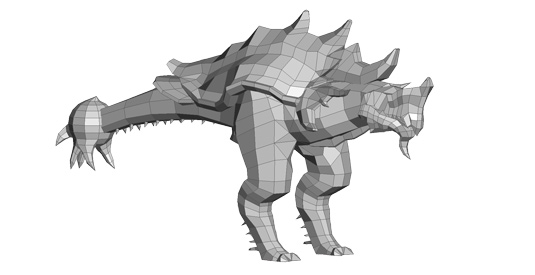
03. Begin modelling
Once everyone is happy with the mock-up version, I proceed to build
the high-resolution version using normal subdivision surfaces to lock down the overall shapes. Special care is taken to keep the overall resolution even for the following ZBrush detail pass.
04. The ZBrush pass
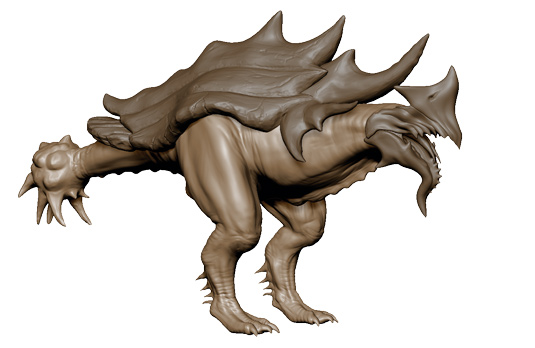
Once in ZBrush, I use various brushes, such as Clay Buildup and Inflate, to flesh out the overall muscle detail, alongside Trim Dynamic and Slash brushes for his back armour.
Given that there are only two of us working on all the creatures, it is more efficient for me to just focus on the medium-sized details and leave the micro-detailing for the texturing stage. Mark provides additional paintovers for close-up details like the head.
05. Create the low-res version
For the low-res I use the original subdivision surface model as a
starting point, while adding additional detail to match the high-res version. Extra geometry is added in key places for proper animation deformation. Since we have no hard polycount budgets and this is for a prototype we can push the triangle count - the Rhinosaur ends up around 18,000 triangles.
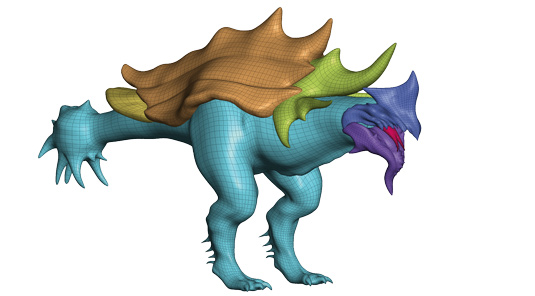
06. Start unwrapping
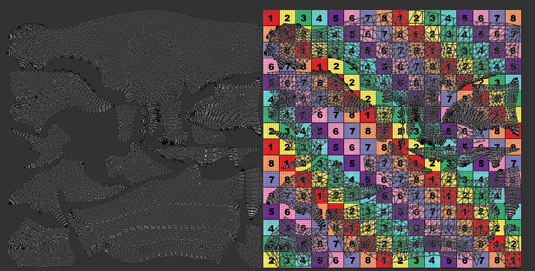
Unwrapping is done in Blender using standard Pelt mapping techniques, this way I can assign seams to edge loops and have the UVs cut around them. This results in just a few UV islands, which are easily organised. To maximise the resolution of the texture, only half of the Rhinosaur is mapped and subsequently mirrored.
07. Baking maps and texture
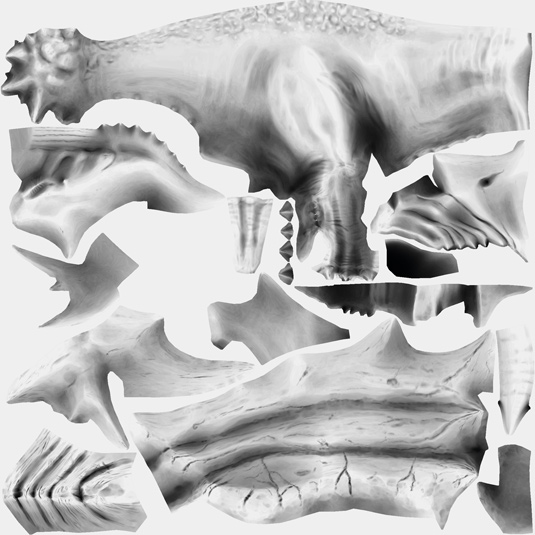
xNormal is used to bake out the normal map along with a number of useful additional maps, including Ambient Occlusion, Curvature, Cavity and Convexity maps.
By selecting certain channels from curvature and convexity maps, and using these selections to add colour in combination with the cavity and ambient occlusion maps, you can create a real sense of shading in a small timeframe. This also gives us a decent temporary version to use in-game for our weekly play-tests while Mark paints the final version.
08. Add the final details
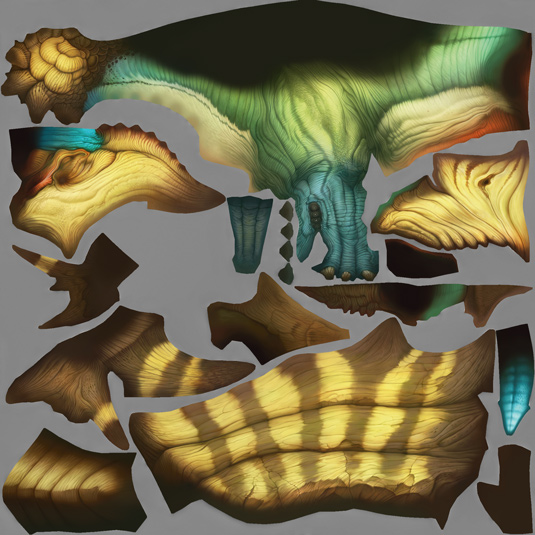
After Mark finishes up his wonderful texture, I extract a number of
normal maps at various detail levels using CrazyBump (which is a quick and easy tool for creating normal maps from a texture). These are then blended together in Photoshop to create the micro-detailing, adding a greater sense of scale to the rhinosaur. By doing this in 2D as opposed to 3D, it allows per pixel control of the detail.
09. The final result
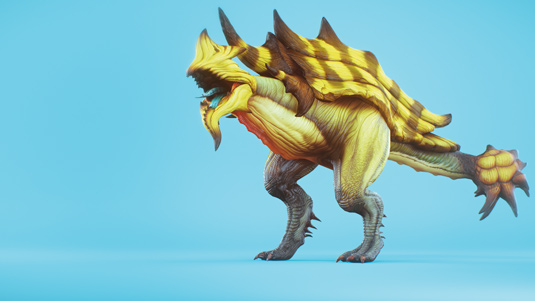
The final model is complete. You can check out more of Mark Facey's work at Creature Journal or find out more about the Canto project at Tetrahedral.
Words: Willem-Paul van Overbruggen
This article originally appeared in 3D World issue 178.
Related articles
Monster High 3d Nail Design Kit
Source: https://www.creativebloq.com/3d/how-create-3d-monster-just-9-steps-51411506
Posted by: grubbsharks1988.blogspot.com
0 Response to "Monster High 3d Nail Design Kit"
Post a Comment